Step one rip apart a pallet. This is by far the hardest part of this project!
I made 3 frames,17 x 18. I needed 1 1/2 pallets.
After getting the wood free it was time to cut. I was planning on using 8 x 10 pictures over top of these frames and liked the look of 17 x18, you can adjust the size to whatever you prefer. I would suggest when choosing the length to go by slats of wood that way you only have to make one small cut . I liked the look of 6 slats for the length and 18 inches for the width.
For this project my Man taught me to use the chop saw.... scary... but after the first cut it was cake. My pallet gave me slats that were 36 inches long by cutting it in half I was able to use both pieces for frames.
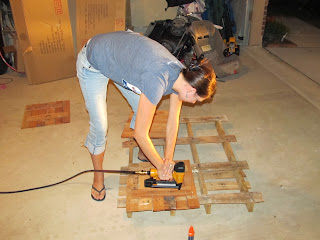
I laid them out and then used some trimmed down pallet wood to hold it all together. This doesn't have to look nice since it is the back.
Apply a generous amount of wood glue.
and nail those suckers in place. Look at me using power tools. My mister has a pretty good collection and is really kind to share (and teach me how).
If you don't have a nail gun, the trusty hammer will get the job done.
I added some contact paper cut from my fancy new sillouette (happy early birthday to me!)
Spray paint away! Once the paint is dry peel off the contact paper and marvel a moment--it looks so cool!
with some wire laying around the garage... you know you have some and a few screws, they were ready to be hung.
I found a groupon for a picture printed onto metal for $5 and knew they would be perfect of this project but a canvas would work or even a regular print with some modge podge .
Here's the finished product:


No comments:
Post a Comment